
Making Your Own Incense Sticks – Basic Knowledge and Useful Information
I will occasionally update this article and add more pictures.
If there are any errors or any ambiguities arise, please leave a comment below.
[Last update: 2024-05-12 – Added slippery elm to the list of wood binders.]
I started making my own incense sticks at the end of 2021, so I’m still more of a beginner myself at the moment.
Since incense sticks require a little more background knowledge than loose mixtures or even “kneaded incense”, I put together some basic knowledge and all sorts of information here.
I’ve decided to only make Japanese-style incense sticks (i.e. without a bamboo core) in general, because it’s much easier and the bamboo always means extra smoke without a good aroma. So my articles always refer to “coreless” incense sticks unless otherwise stated.
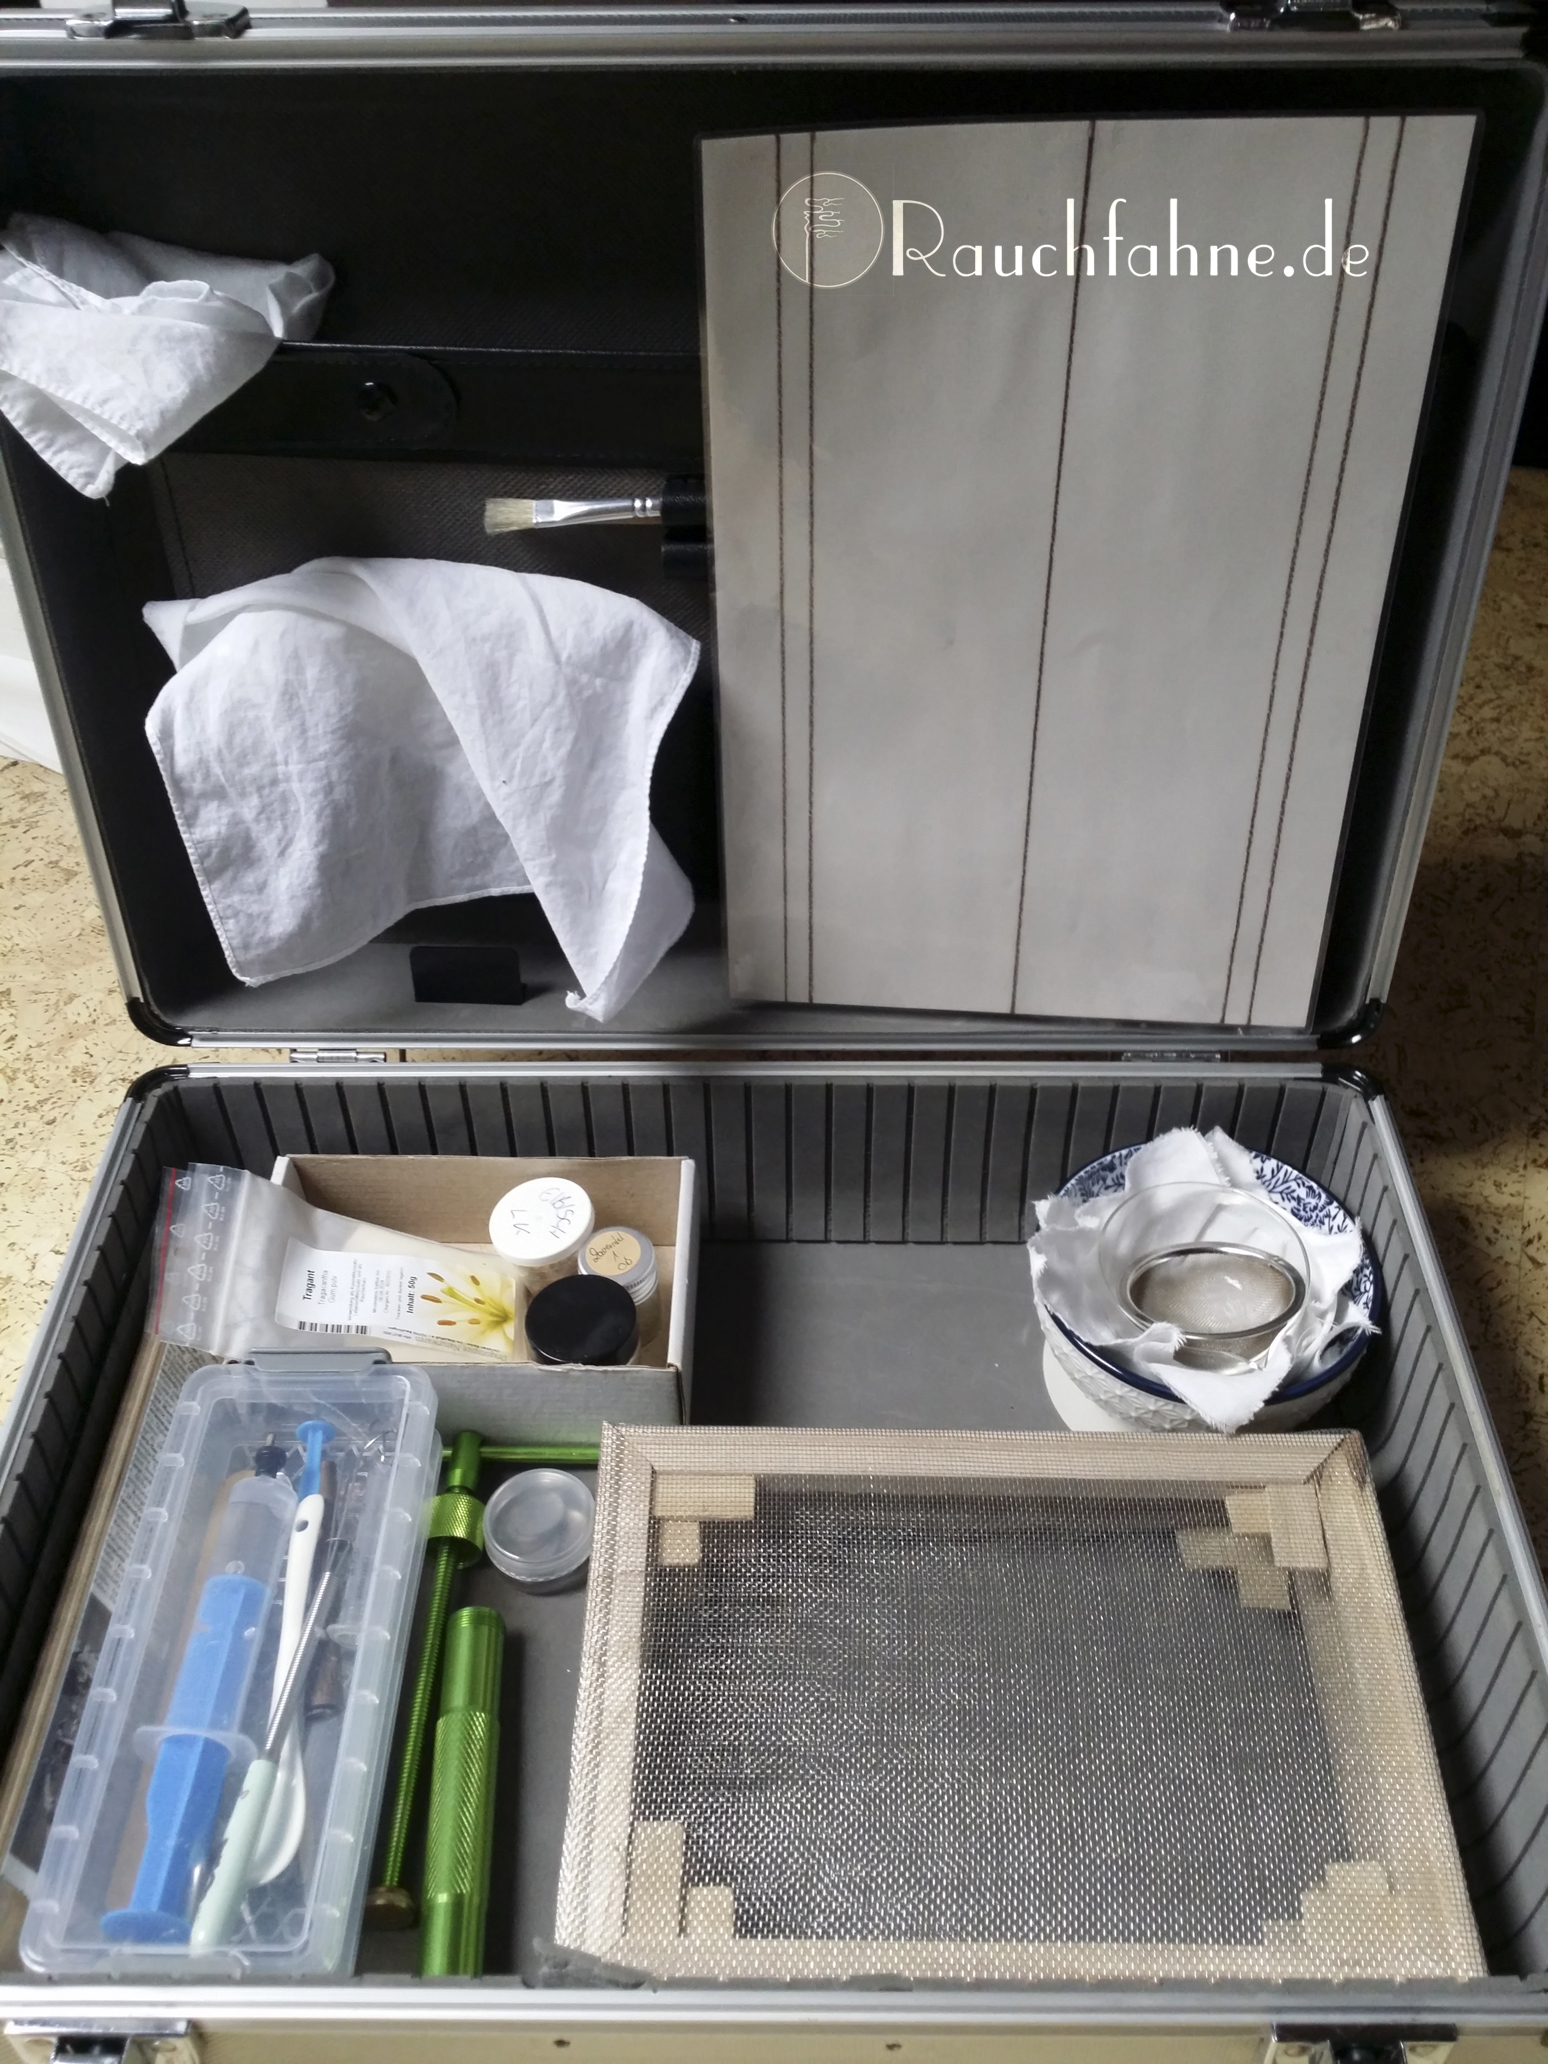
Tools and Aids:
- A dust mask
Seriously: this is forgotten far too often! A simple fabric mask is better than nothing and everyone has one of those at home now anyway. Especially when electrically grinding ingredients and of course when sieving, a lot of fine dust flies up and you would otherwise inevitably inhale it. - Disposable gloves (optional)
I prefer to work without them because I have a better feel for the dough. - A blade grinder – electric coffee grinder with blades
I bought a very cheap one for just under €20. 200 watts, with about 50g capacity (of coffee), which is actually quite large for the purpose. The only thing I really valued when buying it was that it was made of stainless steel on the inside and was easy to clean. Of course, it shouldn’t be too weak either. Another thing to keep in mind is that it shouldn’t be too big because in order for it to work effectively, it needs to be filled to a certain minimum level. If you buy a grinder that is too large, you will have to grind unnecessarily large amounts of material, which may end up losing its smell because you cannot use it up quickly enough. - Mortar and pestle
Plus a lot of patience if you want to use it instead of an electric grinder.
However for resin, especially smaller quantities, it is often the better option, especially if you have resin that is not completely hard. In such a case, it is advisable to put the mortar and pestle, as well as the resin in the freezer for a few hours, which will make it brittle. It’s best to do this last to mix the powder with the other ingredients straight away because if it warms up again, it will become sticky again. - A hand-cranked coffee grinder
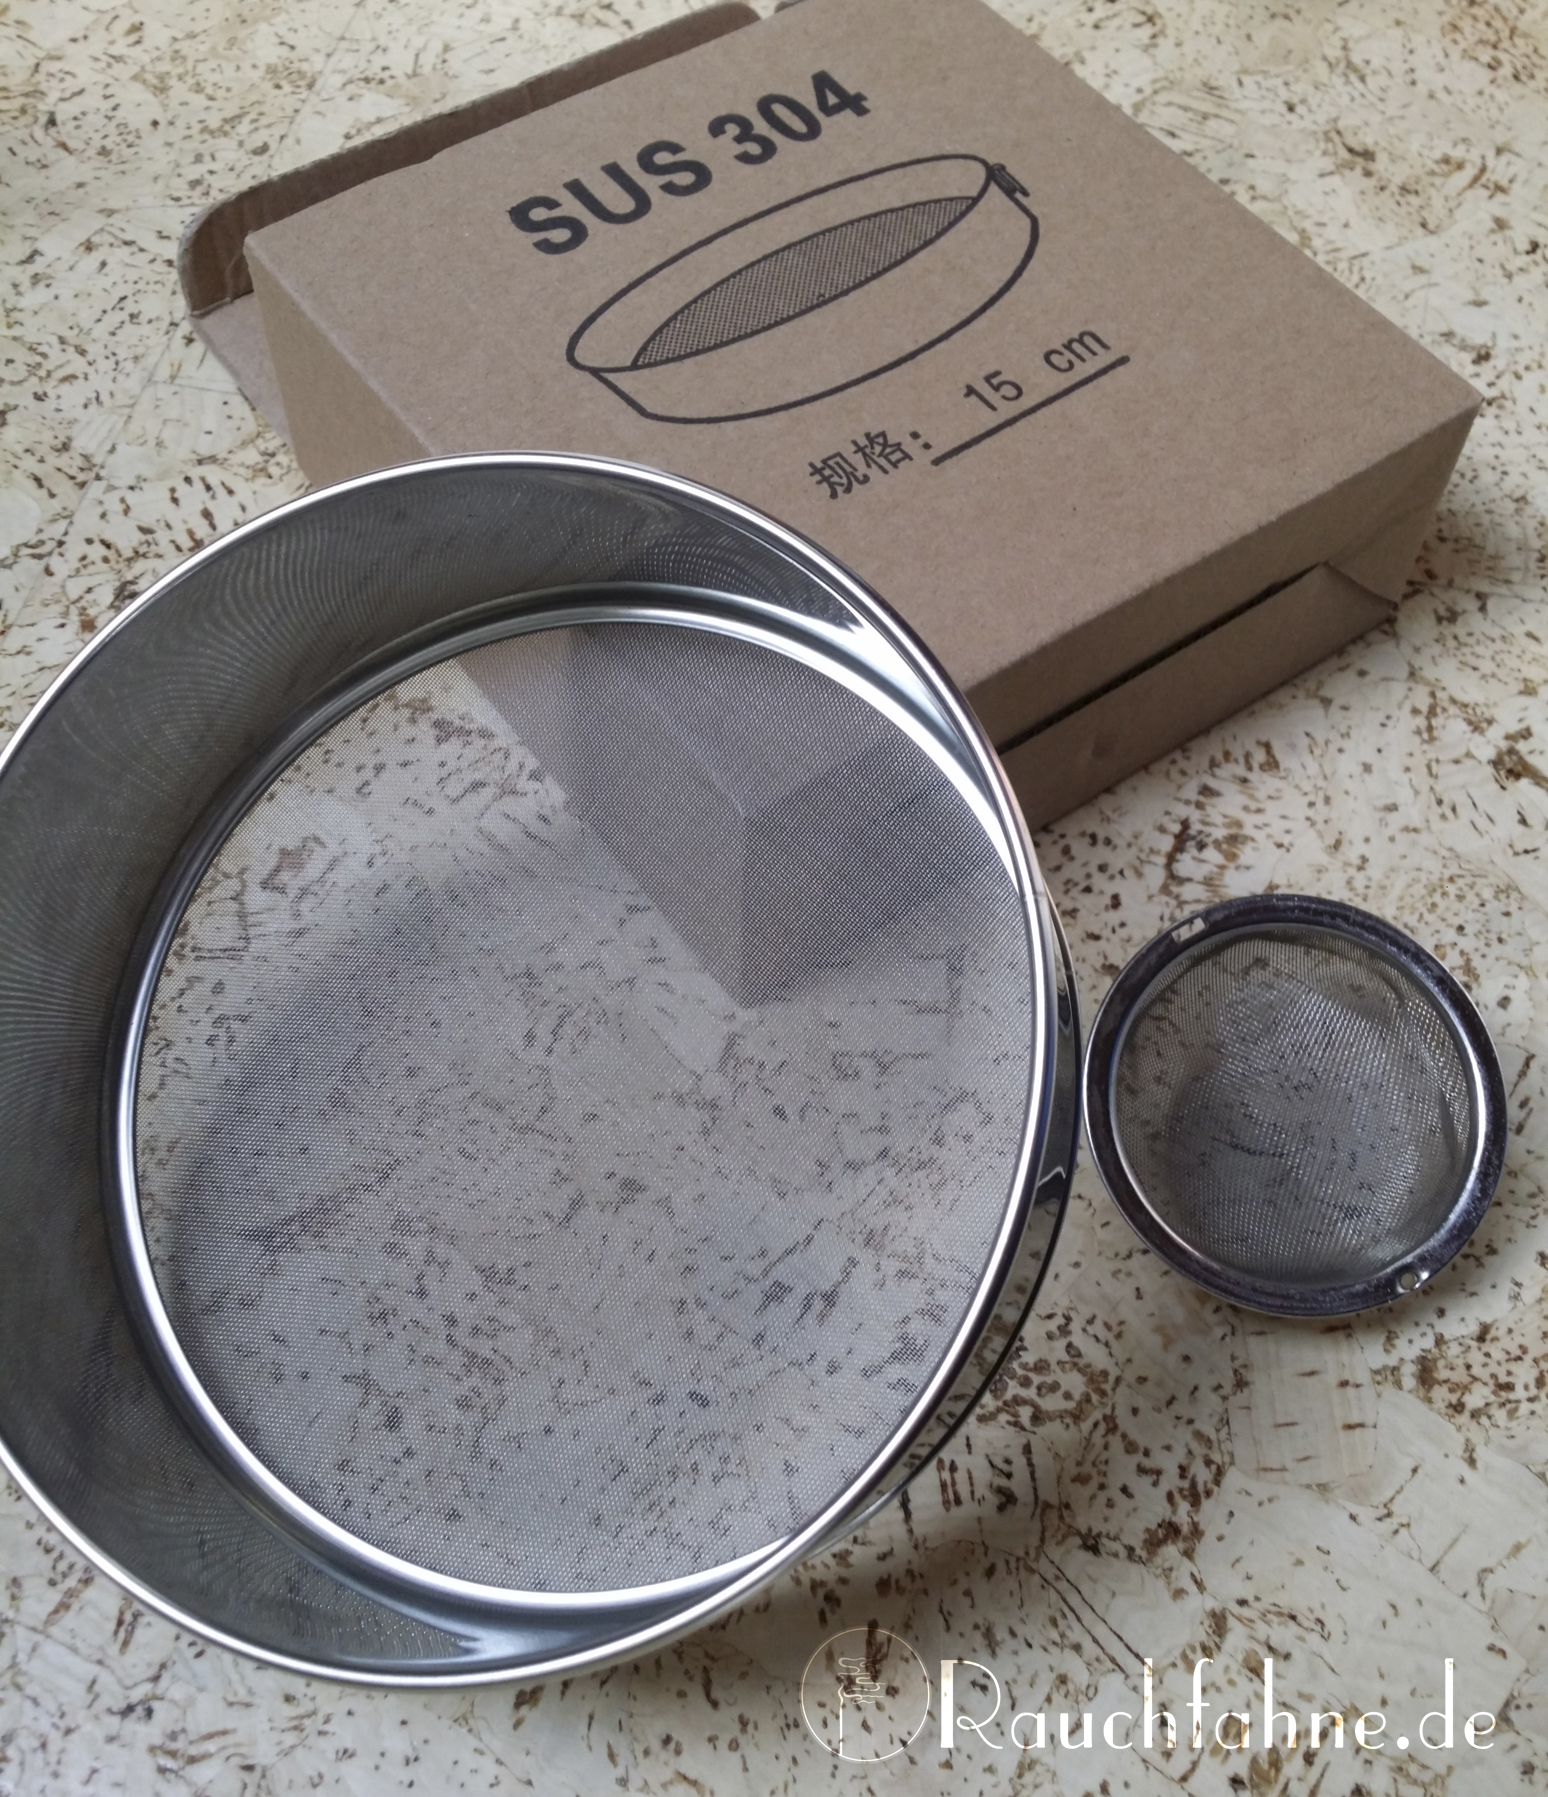
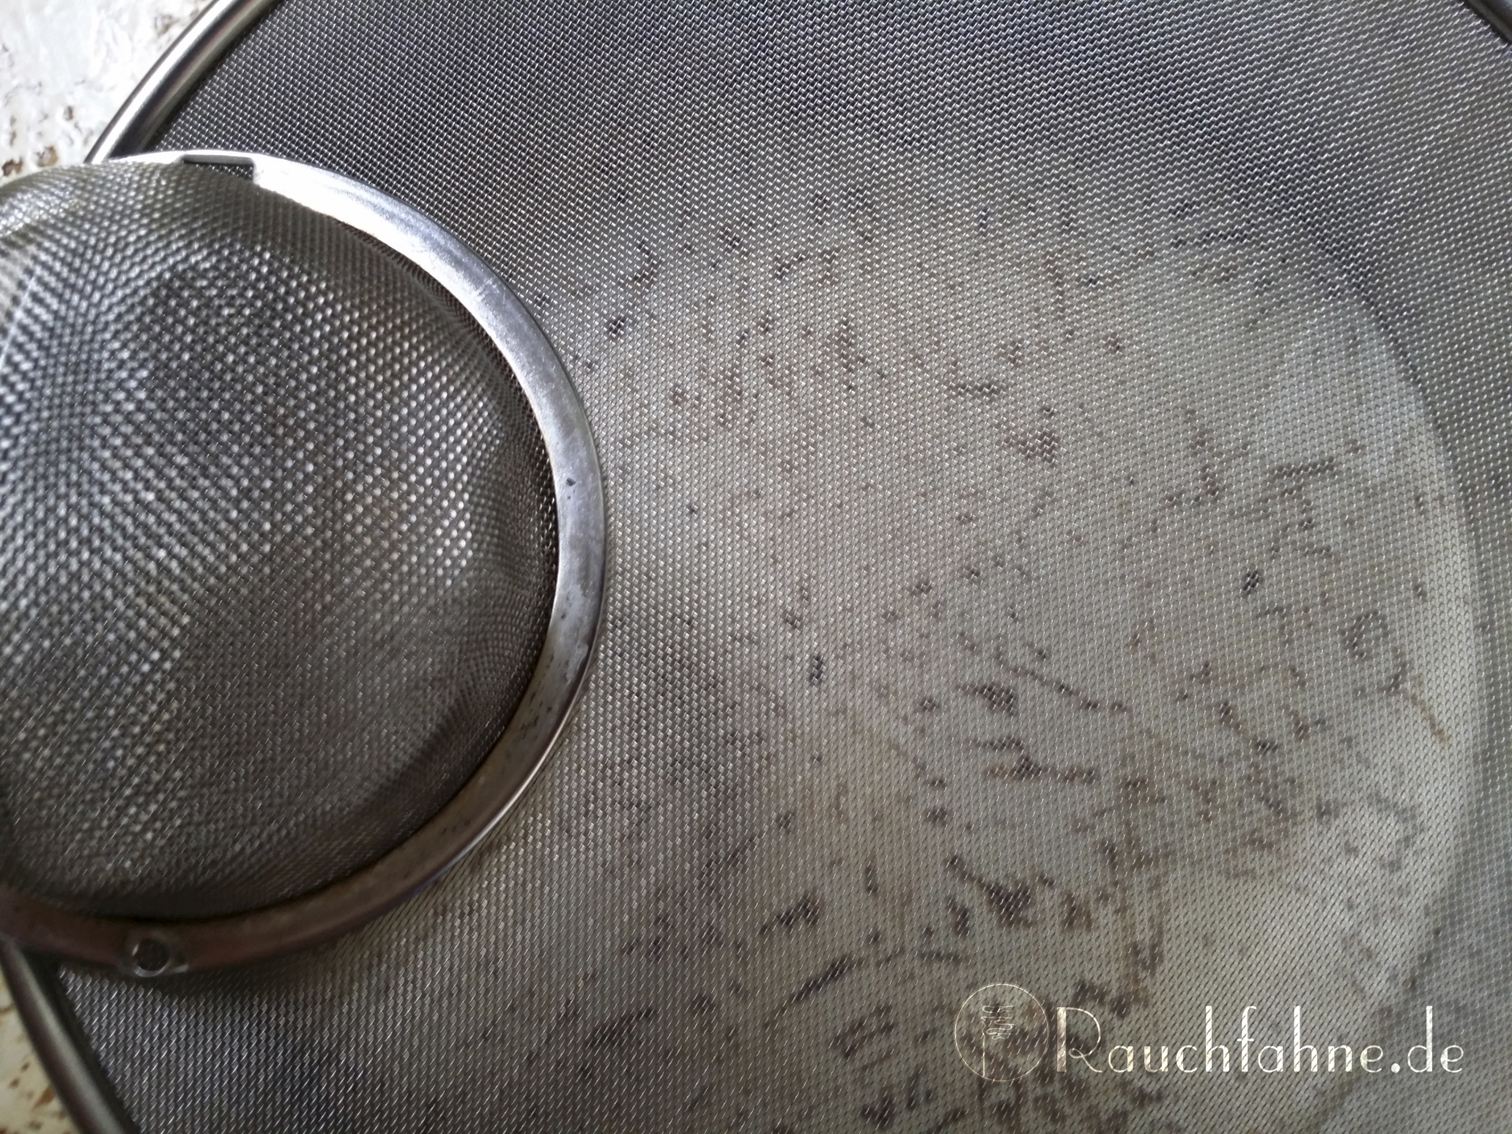
can be useful for pre-grinding ingredients if you want to pulverize them in a mortar. Please do not use this with resins, it will stick to the burrs, and they are very difficult to clean. - A fine sieve
Basically, the finer, the better. I think they should be at least mesh 80 or finer, but I had difficulty finding sieves that stated the mesh number (and didn’t cost a fortune). I bought a very fine flour sifter that people in the reviews complained about being too fine for some flour. For small quantities, I use half a tea infuser.
Some people like to say that the powder should be so fine that it gets stuck in the grooves of your fingerprints. For the most part, mine definitely isn’t. - Fine scales
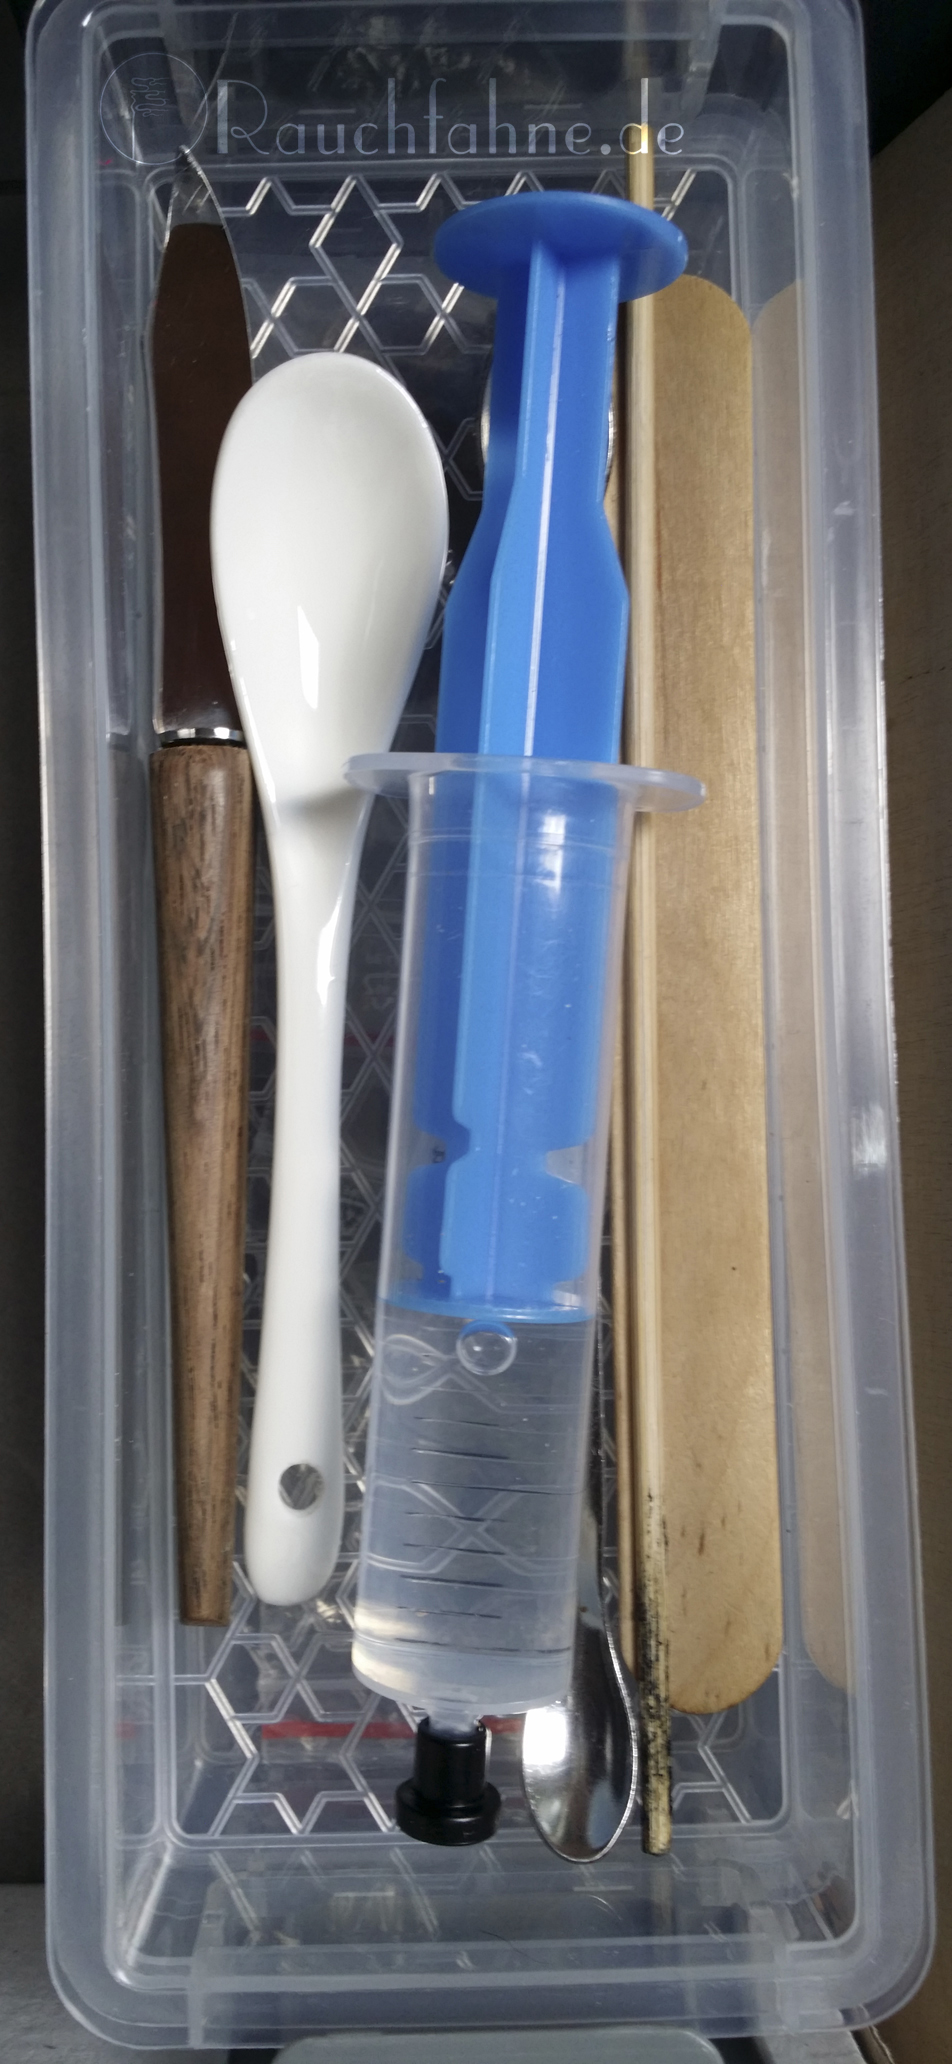
For small batches, such as those produced for your own use, it makes sense to use a scale that weighs accurately to the tenth of a gram. - A Spoon
Not only useful for spooning, but also very useful for kneading the dough, using the backside of it. - Bristle brushes
Simple, inexpensive bristle brushes, like those from elementary school art class. Available in 1€ stores in packs of 10. An understated tool that I use all the time: for cleaning the mill, the mortar, various bowls, or for brushing through the sieves, and I use the handle as a stirring stick. - Bowls, plates
You’ll need several to sift ingredients into, for temporary storage and, of course, finally to mix the dough. - Something to dose water, e.g. a syringe
You can, of course, just use a spoon or a pipette, but I find syringes extremely handy because they have a scale, you don’t spill anything, and if necessary you can dose it down to the drop. I use one with a 20ml scale. - A suitable surface to work on
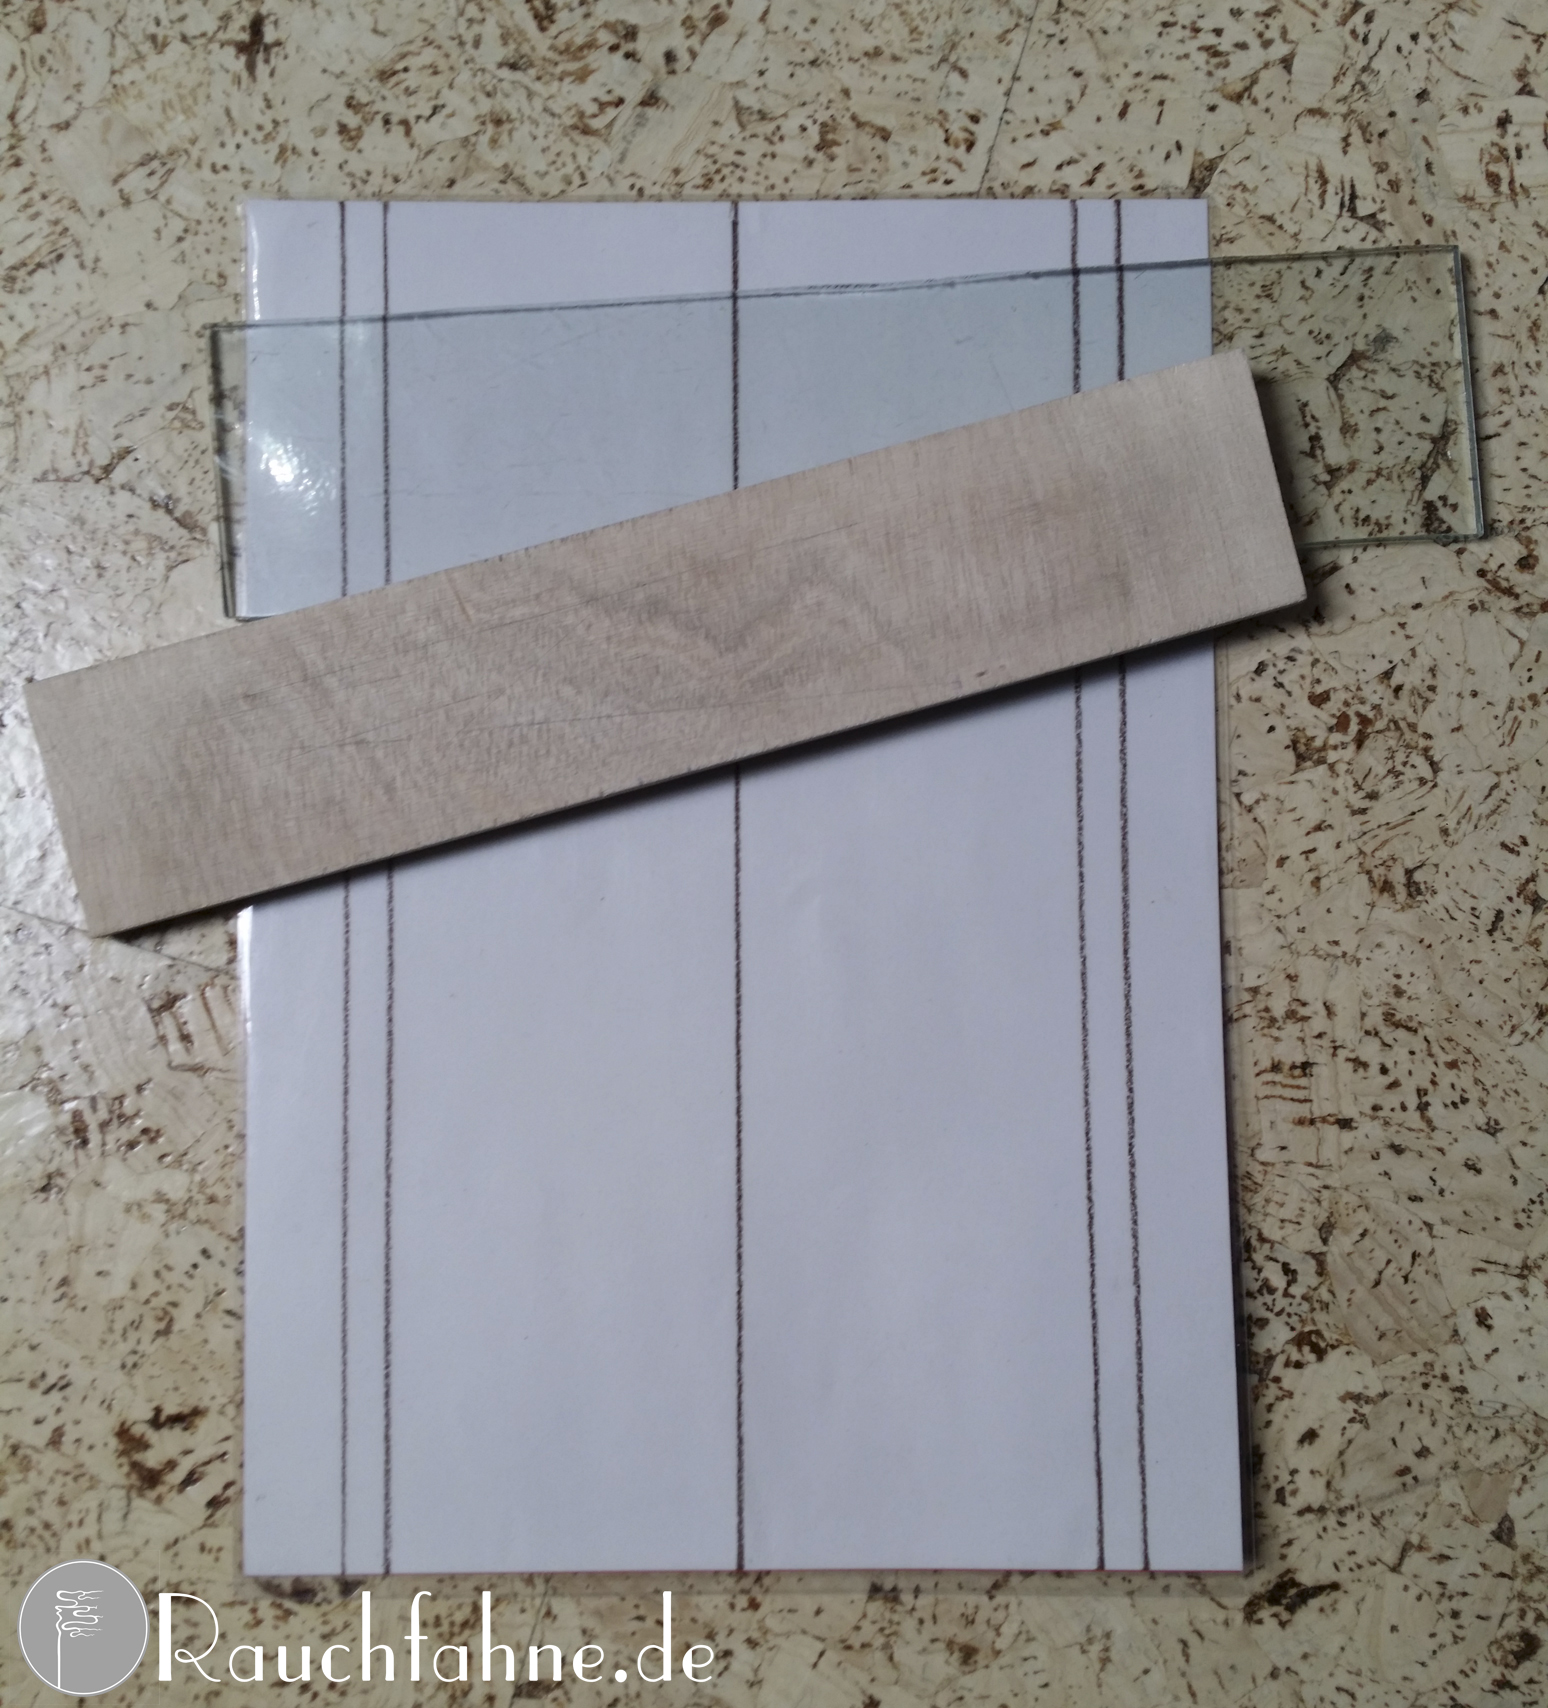
E.g. a silicone mat or a sealed wooden cutting board. In any case, it should be something that doesn’t draw moisture out of the dough, that the dough doesn’t stick to, and that is easy to clean. To start with, I simply laminated a DIN A4 sheet of paper, on which I had drawn some lines (for the optimal stick length). - An Extruder
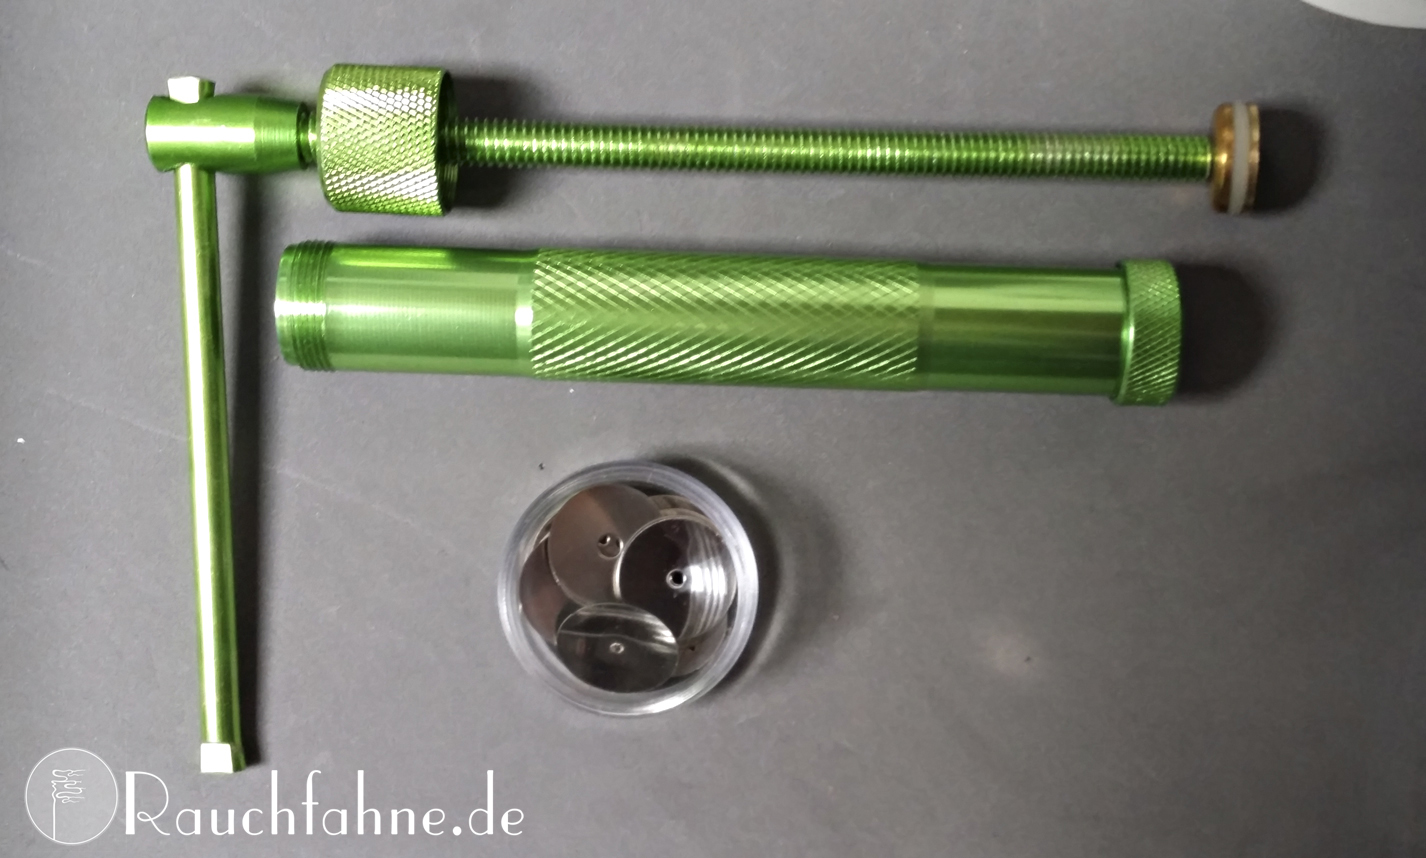
is optional, but I don’t want to have to do without it. I bought an aluminium “fondant press” for about €8. But I have also noticed that people use larger syringes. - Maybe a board
to roll the sticks. This is also optional, but very useful. Rolling the extruded noodles makes them more even, smooths the surface, and you can make them a little thinner if you like.
It should have a smooth surface, be not too thin for easy grip, and be slightly longer than the maximum length of the incense sticks you want to produce. But your hands are the least you need to roll incense sticks.
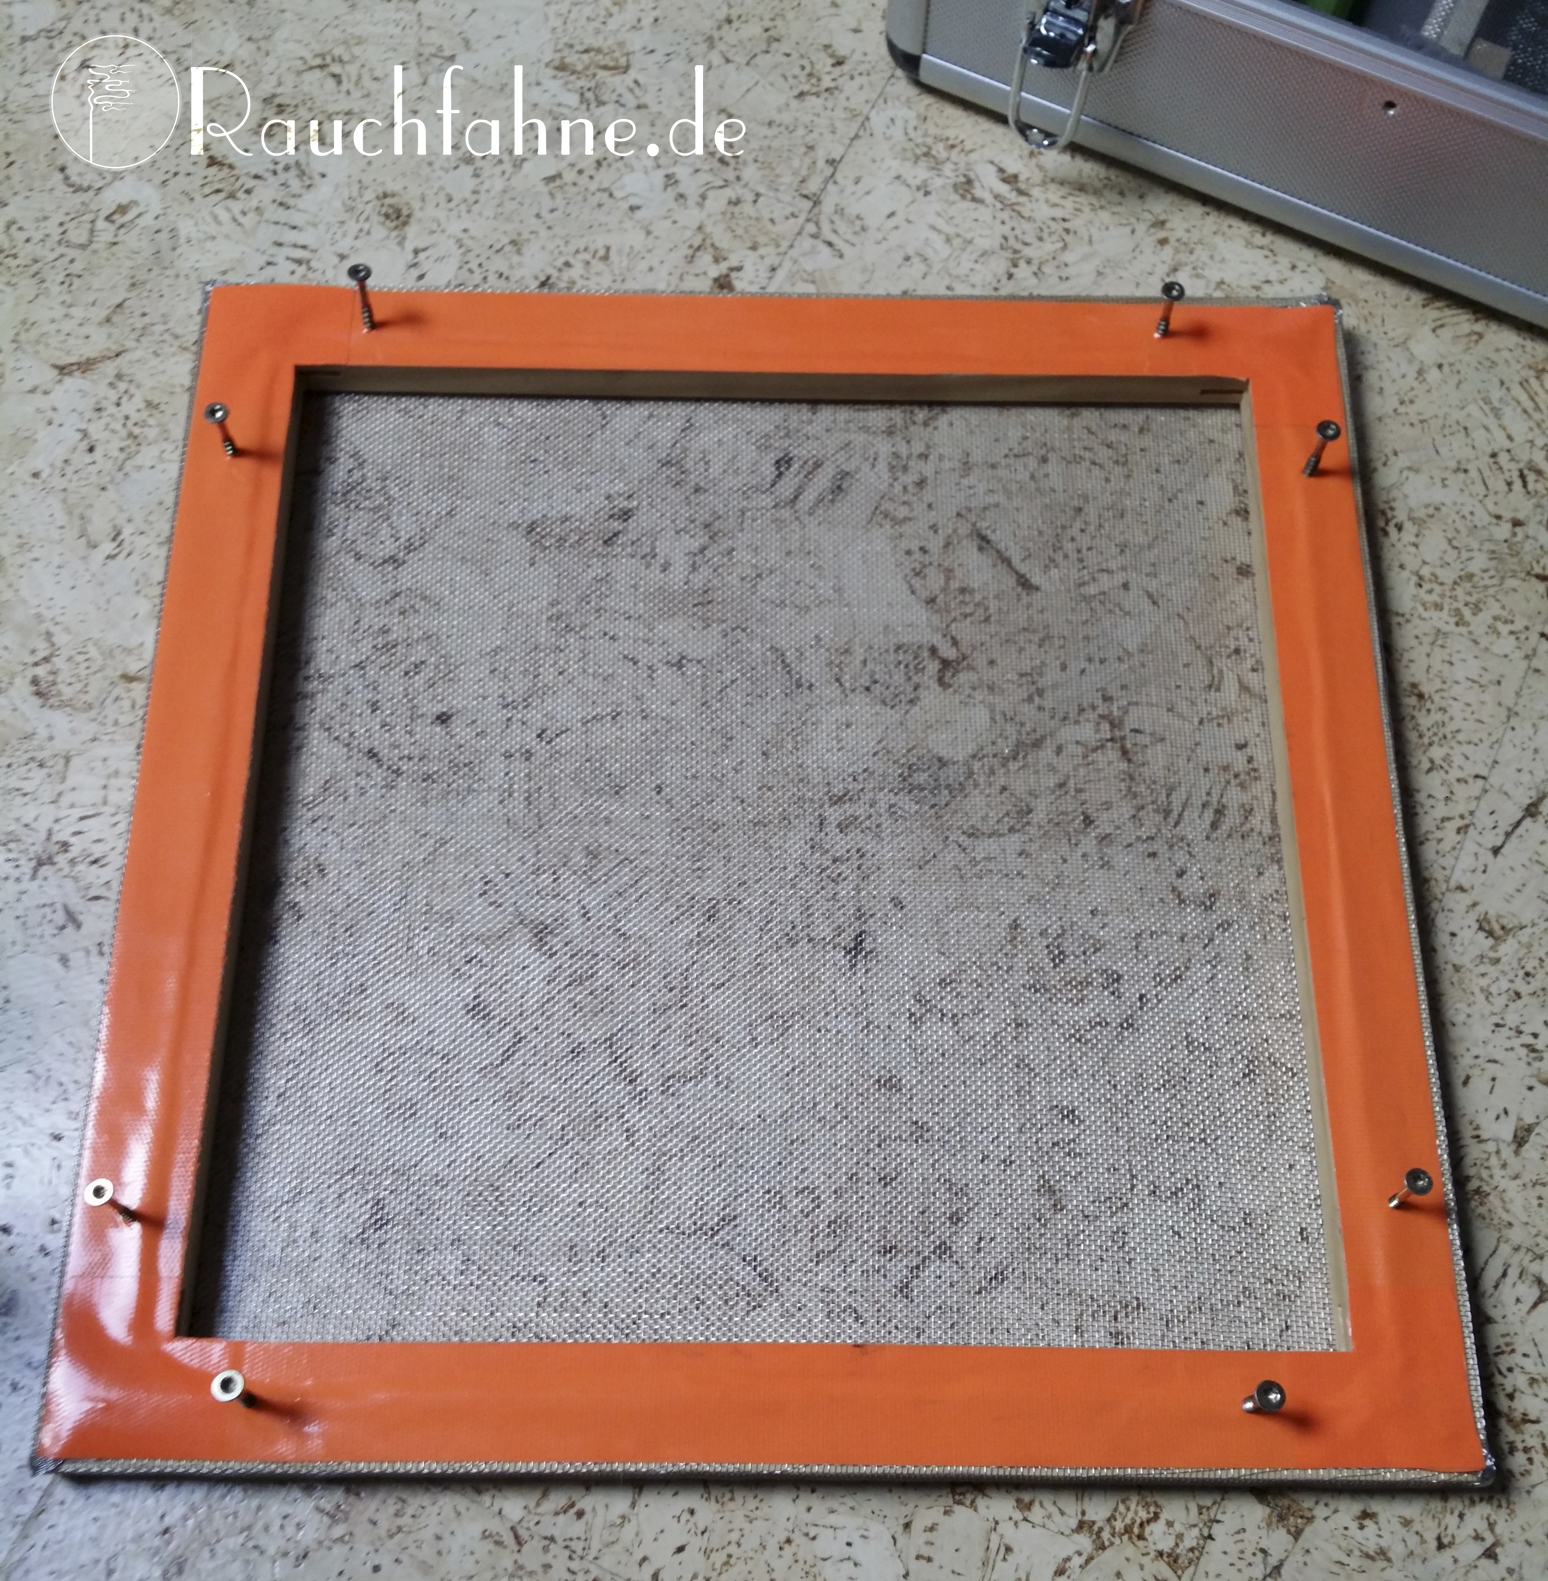
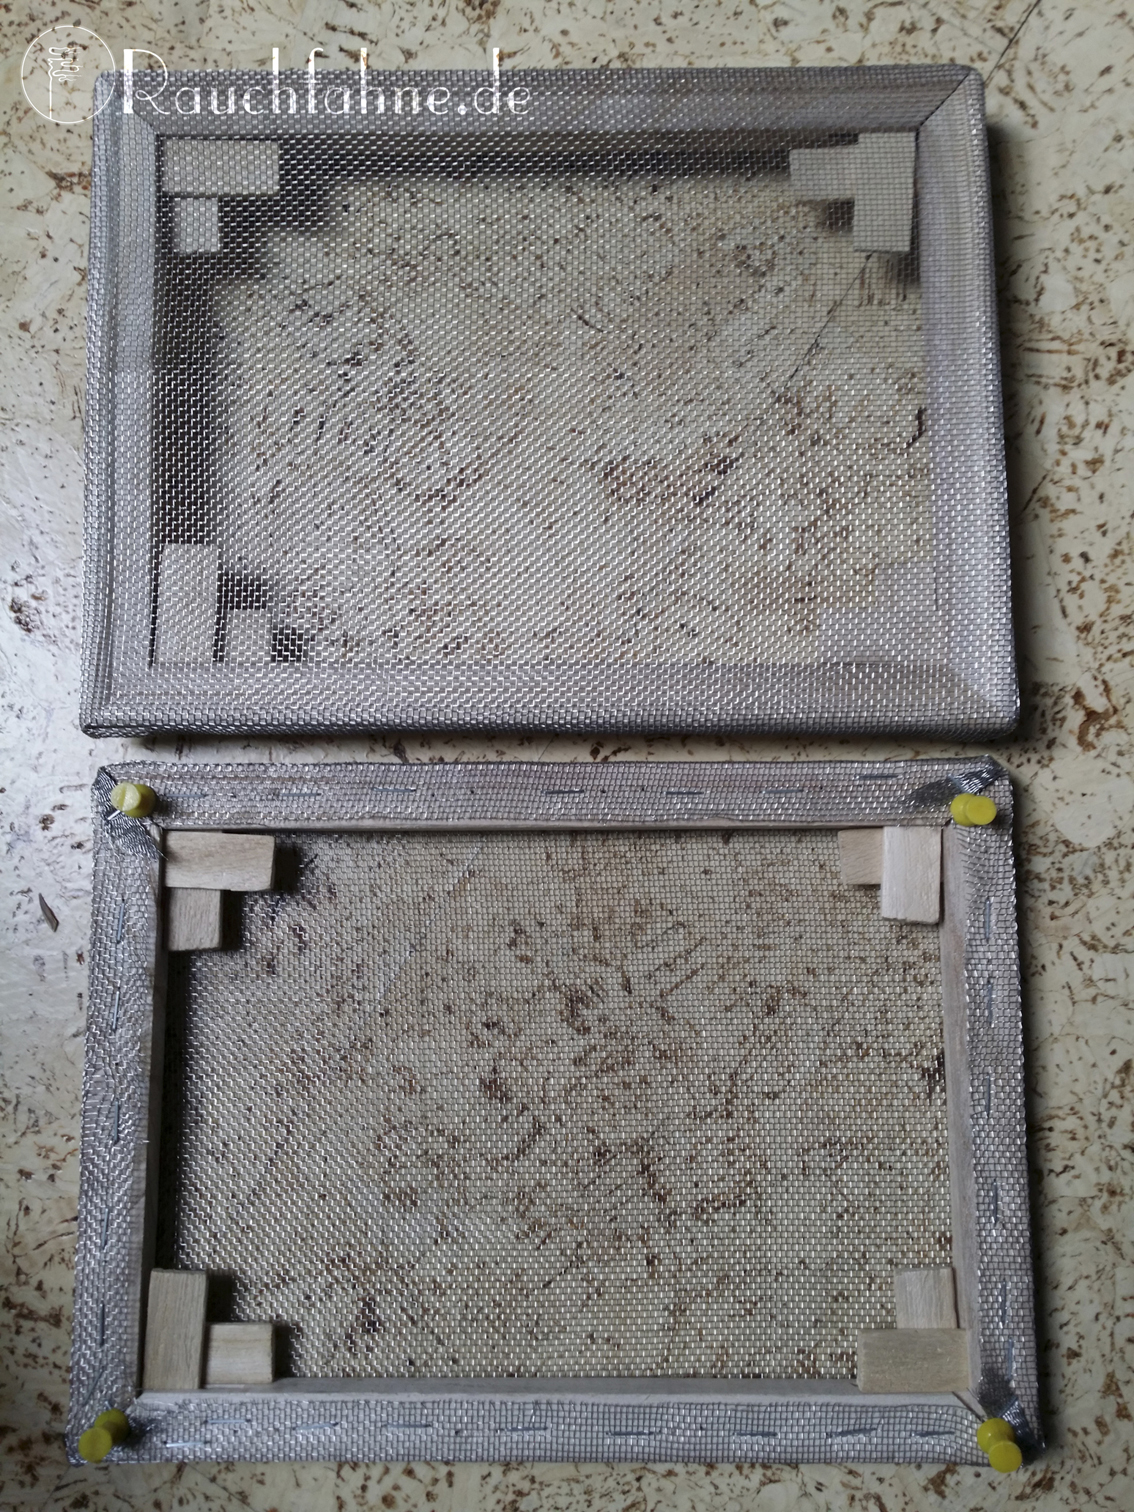
Occasionally, a dough is particularly unforgiving and difficult or even impossible to extrude, then hand rolling is actually the quicker and better method. - You can make a drying rack yourself with a little craftsmanship, e.g. with metal fly screens or plaster screens on a wooden frame.
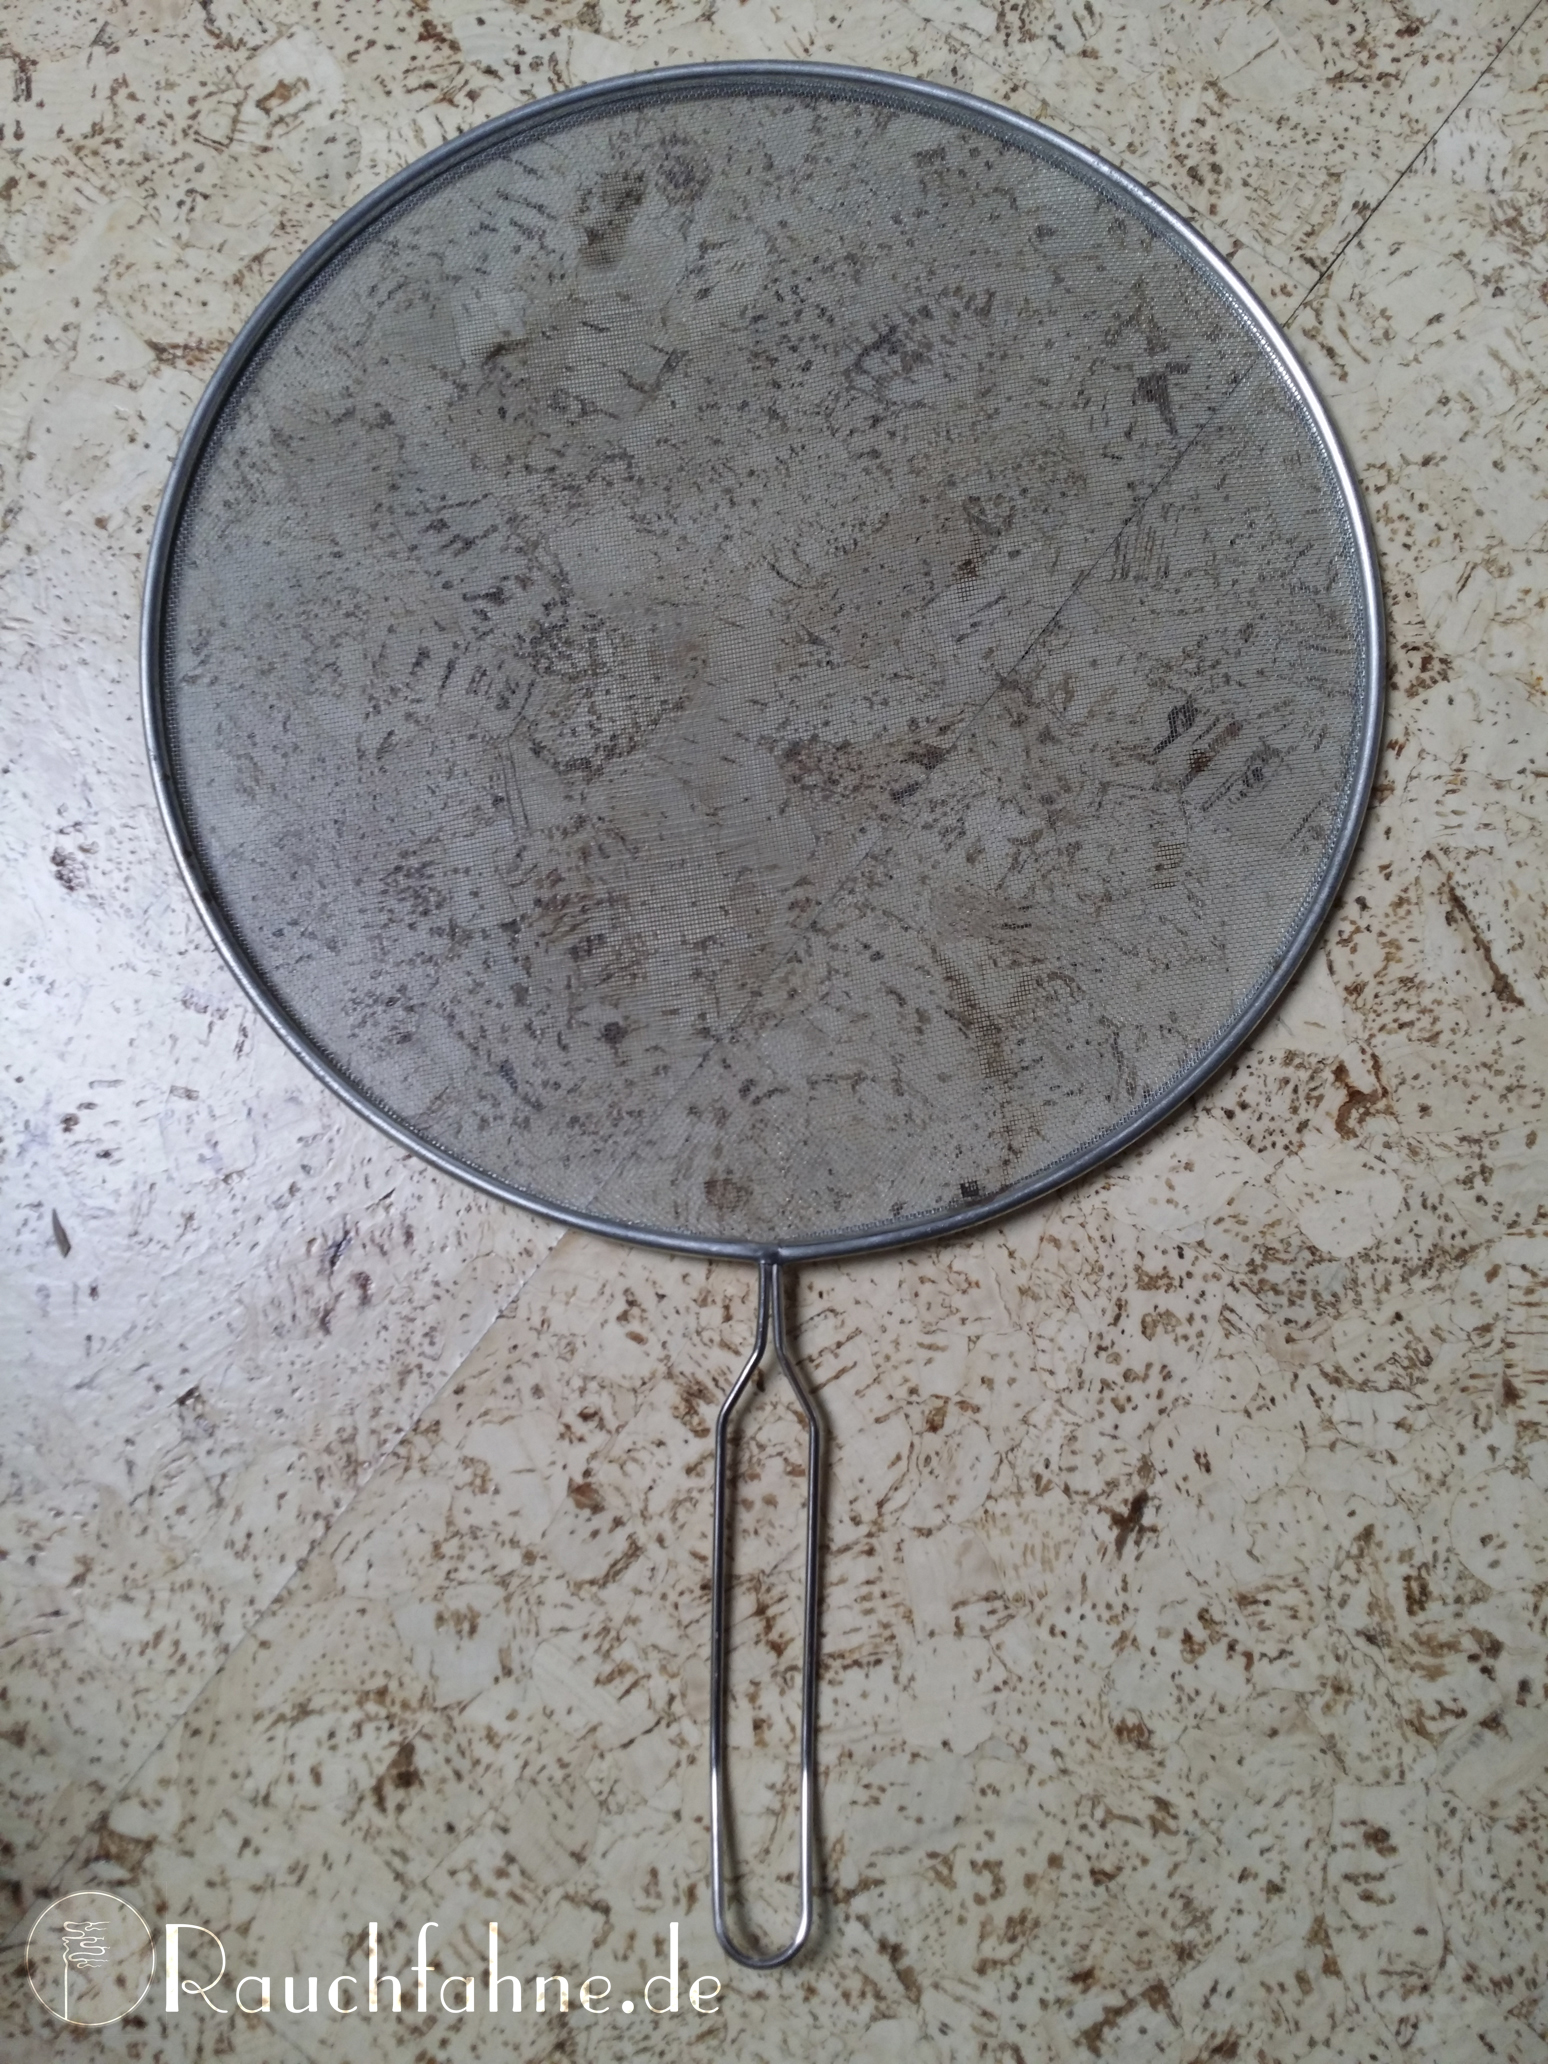
When I started out, I simply used a pan splatter guard.
Some use old fly screens or just use wooden boards.
However, a grid allows for more even drying, which helps ensure that the sticks curve less.

What? How? Why?
Materials
Incense sticks (whether with or without a bamboo core and also cones) consist of 3 essential parts:
base, binder, and aromatic ingredients.
- The base
ensures that the incense sticks can burn or, more accurately, smoulder on their own.
Usually, the ingredients should be odorless or as mild-smelling as possible, ideally underlining the desired scent profile.
The most conventional base material is wood flour. - The binder
provides stability; it glues the ingredients together so that they can be shaped and still hold together after drying.
In the best case, these are also virtually odorless.
There are essentially 2 different types of binders:- Simple binders, which are usually gums and generally burn poorly. These include:
- Gum Arabic – the gum resin of an acacia species.
It’s a very weak binder that, in the required amount for binding, can have a burn-inhibiting effect. Theoretically, this can be used to counteract too rapid burning without significantly affecting the smell. - A domestic alternative would be cherry tree gum (picture), often found on wild cherry trees, especially on older specimens. More rarely, gum can also be found on other stone fruit trees such as plums, apricots, etc. The “almond tree gum”, which can occasionally be found in stores, also belongs to this group.
- Guar gum or guaran is obtained from guar seeds. It is used, among other things, in the food and cosmetics industries as a thickener and consistency agent. It is cold soluble.
- Xanthan gum is also a popular gelling and thickening agent. Xanthan gum is also cold-soluble and is said to be quite potent.
- Tragacanth or traganth is cold-soluble and a very strong binder.
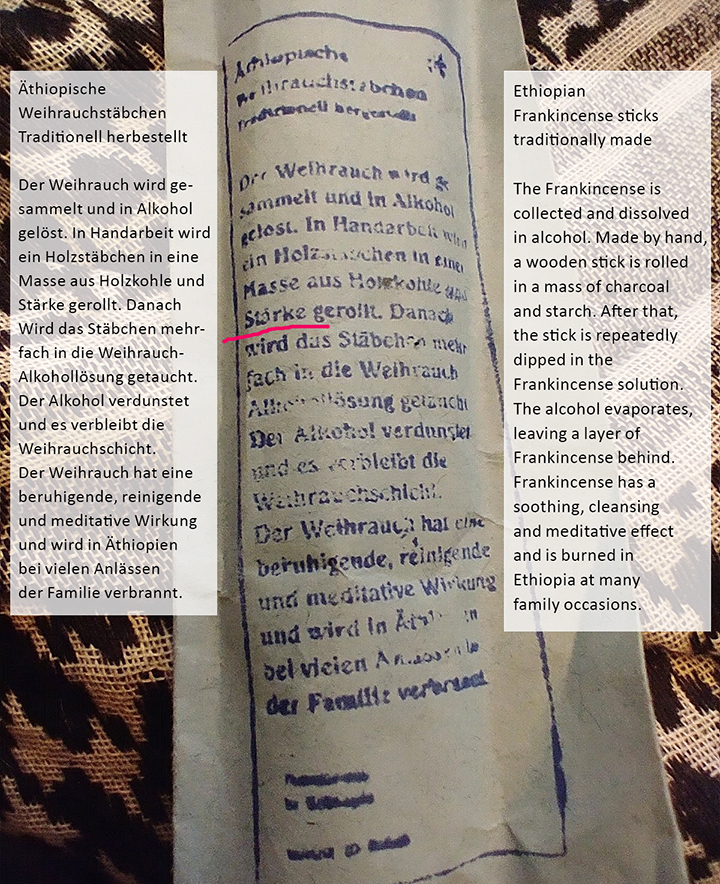
It’s the binder with which I currently have the most experience. - Starch, as we know it from the kitchen, has to be cooked so that it binds. I have long considered it as useless for incense, although I have occasionally read that it can be used as a binding agent. Coincidentally, my blogger colleague Steve Pereira recently sent me pictures of “Ethiopian Frankincense sticks” from an unknown German brand whose description text speaks of the use of starch.
He also pointed out to me that modified starch seems to be used frequently in industrially produced incense sticks.
- Gum Arabic – the gum resin of an acacia species.
- Base+Binder, often referred to as wood binders in English, are typically bark from trees from the Lauraceae family, which contain a lot of mucilage and burn well, e.g.:
- Makko, which translates as “incense powder”, is often used as a synonym for Tabu No Ki, but as far as I know, it is not just the bark powder of a specific plant, but also contains additions of other ingredients, usually burn-promoting ones or such that can fixate scent.
- Tabu No Ki (Machilus thunbergii) – a powder made from the bark of the tree of the same name.
Often used synonymously with Makko, but strictly speaking, it is just the basis for Makko. I heard that it does not burn on its own. - Joss powder, Jigat, Laha – seem to be different terms for the bark powder of Litsea Glutinosa. The name Makko is also often (falsely) used for this as well.
There seem to be different types, but I haven’t found any specific information about them yet. - Dar is mentioned in Carl F. Neal’s book “Incense: Crafting and Use of Magickal Scents” (which I can highly recommend for beginners and interested people). He describes it as a traditional Tibetan binder that is rather difficult to extrude but becomes very sturdy once cured.
- White ash (Fraxinus americana), or rather its bark, was discovered by Carl F. Neal as a binder. According to him, it has a distinctly woody smell like campfire, so it won’t work in every recipe.
It would be interesting to see whether other ash species also have potential as binding agents here. - Slippery elm seems to be another option. Redditor u/GlossyBean likes to work with it.
- I mention Phoebe zhennan for the sake of completeness. It is probably used in China. I became aware of this through this Reddit post.
- Other, unusual binders:
- Agar-agar – is not a classic binder for incense, but is apparently often used in the DIY sector when other gum binders are not available.
A major downside is that it needs to be heated to bind.
It is made from a certain algae. - CMC or carboxymethylcellulose, also called Sugarcel or Tylo in the food sector, is an industrial product that is obtained from wood.
It appears to be an extremely potent binder and also cold-soluble.
Here‘s an r/Incense post from a curious person who compared CMC, xanthan gum, guar and gum Arabic. - Marshmallow root of the plant Althaea officialis contains a lot of mucilage, but is significantly less potent than Laha and does not burn on its own. The smell is a bit strange, it has something of licorice, with a hint of old ginger powder.
- Plantain species also contain mucilage – the Canadian DIY incense enthusiast u/StellaVulpes decided to only make incense sticks with local, self-harvested ingredients and discovered the seeds of the broadleaf plantain as a binding agent. I find her endurance and persistence highly impressive.
- I discovered cassia bark (Cinnamomum cassia) as a base+binder. Well, probably not as the first and only one, but I haven’t found anything about it in the specialist literature so far. Not even Carl F. Neal “The Incense Dragon” mentions it in his book referenced above.
Cassia is significantly less potent than Laha, but you can achieve good results with it. It burns on its own. - However, Neal mentions sassafras, which is used in the context of food, it is a slightly aromatic material with only weak binding properties and, according to him, unfortunately not a good base material because it does not burn on its own.
- Agar-agar – is not a classic binder for incense, but is apparently often used in the DIY sector when other gum binders are not available.
- Simple binders, which are usually gums and generally burn poorly. These include:
- Aromatic ingredients
are what you’re supposed to smell at the end. The aromatic ingredients can be roughly divided into groups such as resins, balms, gums, woods, barks, roots, herbs, flowers, fruits, etc. Many within a group have similar properties, for example, resins are usually very fragrant and produce a lot of smoke, but greatly reduce the ability to burn. Woods, barks and roots usually burn very well, but there are, for example, very resinous woods for which this does not apply.
Some highly aromatic ingredients have special properties, for example, cloves can increase the ability to burn, which is probably due to the very high essential oil content.
There are other aromatic ingredients such as essential oils, absolutes or tinctures, which I don’t want to go into in depth now because I consider them as rather advanced and I don’t know enough about them yet to make any confident statements.
Very often the areas overlap, so in addition to the binder+base materials there are also aromatic base materials, some binders have a more noticeable smell of their own and there are some aromatic ingredients that have weak “side effects” that can be benefited from. For example, many “resins” are actually gums or, chemically speaking, mixtures of resins, gums and other substances and thus can support a binding agent. Myrrh is a gum resin, most types of frankincense contain some gum. In English, it is a bit trickier, here resins are often called “gum” even though they are not.
Cassia bark is both a base, a binder and an aromatic ingredient.
- Water
Use distilled water or boil it to prevent mould.
It is possible to use hydrosols (floral water) instead of water.
Other aromatic liquids can theoretically also be used, for example coffee, teas, even wine or other alcoholic drinks. Just keep in mind that the binder needs water to bind, too high an alcohol content can weaken a binder or prevent it from working altogether. - Other possible ingredients:
- Charcoal
This can be ground charcoal from different woods, coconut charcoal or activated charcoal.
Charcoal, when not used as a base for oil-dipped incense, is a highly effective burning aid. This may be necessary if you want to make incense sticks with a high resin content. As a rule, you usually only need a maximum of 5% of the weight of the dry ingredients.
Charcoal increases the need for binder, degrades extrudability, and has a potentially negative impact on the scent if overdosed. Too much charcoal causes the incense to burn too quickly and too hot, which can have a particularly bad effect on the smell of sensitive ingredients. - Honey is often mentioned in Indian incense. It’s not entirely clear to me what its function is. It has a certain aromatic value, some say it also serves as a binding agent, others say it has a slightly preservative effect.
I’m familiar with its use primarily from kneaded incense like Kyphi.
It seems important to use wild honey or honeydew honey in all cases. This is probably due to the composition of the sugars. Honey consists of dextrose and fructose (among other things), usually with a higher proportion of fructose. In wild honey, the fructose content predominates somewhat more.
Nowadays, bees are often fed a sugar solution to produce honey (which also causes the honey to crystallize quickly).
Honeydew, unlike flower honey, is the honeydew collected from insects such as aphids.
Regular sugar, or dextrose, seems to give the incense a burnt sugar note, while fructose seems to give off a better, sweeter smell.
Unfortunately, I don’t have a reliable source to support the statements, but I have heard and read it repeatedly, and have therefore only ever used honeydew honey. - Syrups; plant-based sugar with high fructose content
I recently tried date syrup for one of my kneaded incense creations and also formed 2–3 sticks from the dough. Date syrup also has a high fructose content. I was very positively surprised by the result.
Mother’s uses “jaggery” instead of honey for their vegan incense sticks. The term can mean both palm sugar and cane sugar. So vegetable syrups seem to be a viable vegan alternative to honey, and an expansion of the possible ingredients.
- Charcoal
The Process
You can roll incense sticks with your hands only, preferably on a smooth surface where the dough does not stick.
The sticks become rather uneven, especially if you are not trained well – for example, I tend to produce “rat tails”, i.e. ones that are very thin at one end.
Hand rolling tends to work better when you have dough that is difficult to extrude.
I also think it’s appropriate for making ritual incense sticks, to work the respective intention into the dough.
Of course, extruding is much faster. It also potentially allows you to make significantly longer sticks.
One disadvantage is that you have to pay particular attention to ensuring that all ingredients are ground finely enough and are properly sieved, and certain ingredients can also have a negative impact on extrudability. Charcoal is one of them.
Currently, I’m still using the flat metal inserts that came with my fondant extruder. These always cause the dough to “fray” a little, which is why I give the noodles that have been cut to length a final roll with the rolling board (at least for many types) which makes them more compact and smooth, more stable and a little thinner.
With a cannula-like outlet, the dough noodles appear to be much smoother, which is why some people use syringes.
I intend to retrofit my extruder like this, but haven’t found anything suitable yet.
The thickness of the sticks will affect the intensity of the smell, the amount of smoke, but also the burning time and possibly the burnability. Sticks that are too thick tend to go out.
My current procedure is as follows:
After grinding, sieving and mixing the ingredients, I add distilled water in portions and stir or knead the dough with a spoon until it appears homogeneous and no longer breaks or shows cracks when folded.
I often let it rest in the fridge for a while (1-3 hours), then knead it again and fill it into the extruder.
I extrude a long noodle of dough onto my surface in wide loops, but still leave enough space to work on.
Then I cut a measured piece (using a mark on my rolling board), roll it and place it on the drying rack. To straighten it, I use a shrink-wrapped bookmark or a wooden tongue depressor.
I also make sure that the sticks are not close together because this has always resulted in them bending.
Especially for larger batches, I cover the finished, fresh sticks with a thin cotton handkerchief to prevent them from drying out too quickly and thus from deforming.
To dry them, I put them in a cool room, for me, this is the unheated attic, which is around 12°C in winter. I find temperatures of 12-16°C produce the best results. Above 20°C seems to significantly increase the chance of bent sticks. This is also the reason why I tend to make incense sticks during winter.
I also keep them covered while they dry. I have the impression that this results in more even drying that preserves the aroma.
They are completely dry after a maximum of 2–3 days. Afterwards they can be used, but my experience so far has shown that they “ripen” if you let them sit for a while. I would recommend at least 2 weeks.
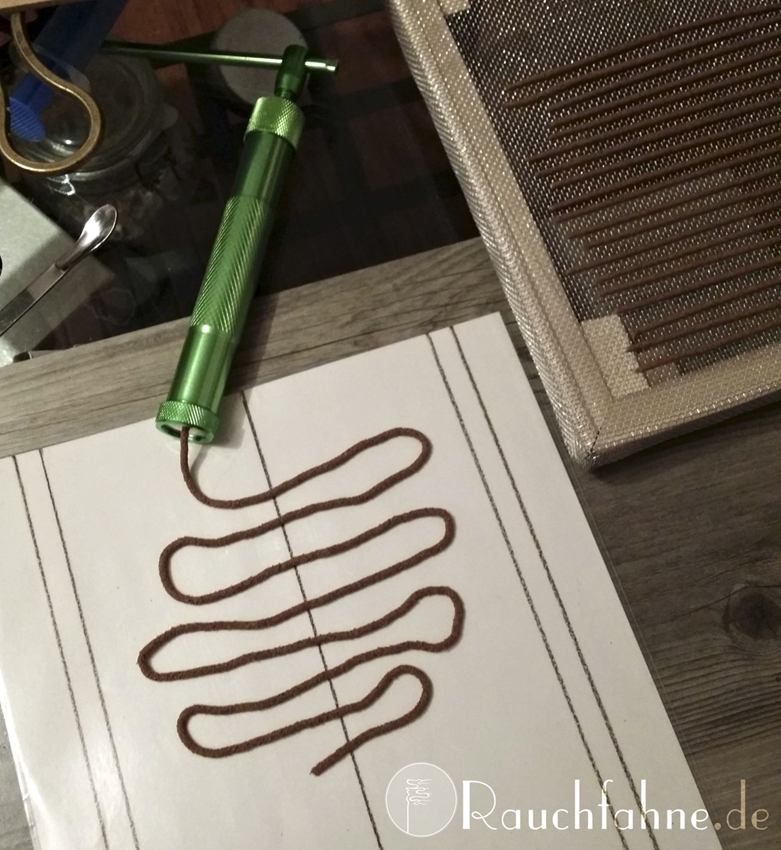
An extruded dough noodle. On the right in the picture are finished sticks to be dried on the drying rack.
Tips
Especially as a beginner or when working with new materials, it may make sense to set aside a small portion of the dry mixture so that you can correct it if you accidentally add too much water to the dough.
You can always bind the portion later and add it to the rest, or use the dry powder to coat the sticks with.
Think about how and what you want to store your incense sticks in advance.
There is no point in making extra long sticks if you then have no way to store them safely, and it is very frustrating when the sticks that you have made with a lot of love don’t fit in something because they’re just a centimetre too long.
Incense sticks shrink when they dry. I suspect it’s not the same for every recipe and binder used, but my Frankincense sticks, which were 19cm long after extrusion, were only 17cm long after drying. Another batch shrank from 15-17cm to 13-15cm.
Around 2cm loss of length!
You can test your recipes.
You don’t have to bind the entire batch at once, test whether the binder is sufficient by binding a small amount in the palm of your hand with one or two drops of water and rolling it.
Let it dry to find out if the stick is sturdy – and if it burns. You can also carry out a burning test without forming sticks first if you use a bowl of (cleaned) ashes. There is special Japanese incense ash, referred to as “Miyako Hai”, “White Ash”, “Rice Chaff Ash” or “Kodo Ash”, which allows oxygen to reach the incense from all sides, including from below, and is odorless. Unfortunately, it is not easy to find here and is expensive.
You can also take simple wood ash out of a wood stove, but you should at least sieve it. However, depending on how “dirty” it is, it might have a relatively strong smell. The brighter the colour, the cleaner it is.
The technique I use for this is called “trail burning”. You level the ashes in a bowl, compress them slightly and then, for example, using the edge of a spoon, make a shallow trench in the ashes into which you carefully add a line of the powdery incense mixture. You also compress the powder a little and then light the trail on one side. If the trail keeps smouldering on its own in this way, it can be assumed that the incense sticks made from it will also burn. (Image)
If it doesn’t, you have to scoop the powder out again, losing some ash. If it burns down, you can simply stir the ashes and mix it in.
If you use wood ash, you’ll always smell it a little. I can ignore that quite well, but others find the smell very annoying.
If you just want to test the smell, you can also put the powder on a live charcoal. I recommend using natural coal that are not “quick-igniting” ones that contain saltpetre. Aside from being stinky, it burns hotter than natural charcoal, which negatively affects the smell of the incense. If you don’t want to buy expensive Japanese incense charcoal, there are coconut charcoal cubes for hookahs that you can also use. You may have to cut them smaller. Warning: They take a really long time to get going. Normally, a special device with heating coils is used to ignite those.
If you cut the cubes into smaller ones (using a saw) they can be lit using tweezers and a “jet flame” lighter.
You can also make small charcoals yourself, but I’ll explain that another time.
Incense sticks mature, I already mentioned this briefly above, but I would like to emphasize it again here and go into it a little more detail.
2–3 weeks seems to be a good amount of time; this also applies to kneaded incense and even loose incense mixtures.
This phenomenon is also known with essential oils. If you mix oils for a perfume, you also let them sit and hang out together for at least 2 weeks to let them “harmonize”. Even if you use different oils in an incense recipe, it is advisable to mix the oils beforehand and store them as a mixture if you plan to make the recipe repeatedly.
With my first incense sticks, which I made with cassia and a lot of frankincense, I noticed another clear change after nine months. Even after the first ageing period, I found them a tad too rough, a bit pungent and generally too potent. After almost a year, the smell suddenly became much milder and rounder and the unique character of the Frankincense used finally came to light, where before I had only smelled a general Frankincense scent. I made that experience with all 3 varieties that I made.
If, like me, you are into re- and upcycling: The cylindrical packs of effervescent vitamin tablets are ideal for storing incense sticks. You just need to modify the lid a little. Cut off the spiral at the base (preferably with a carpet knife/cutter etc.) and remove the cardboard plate to empty the silica granules. (Silica absorbs moisture, but also odours.) Then you can cut off the inner part that previously contained the silica as well.
The result is a very flat, tight-fitting lid. Sticks of approx. 13.5cm length fit into the cylinder. Short Japanese incense sticks are usually about that long.
If you then cover the tube with decorative foil, the result is quite neat. (Photos to follow!)